- Filters & Tags - Quickly find the content you need.
- Content Preview & Review - Easily Approve, reject, or request changes to submitted content within your team or with external partners.
- Usage Rights - Assign specific content usage rights and permissions to never lose oversight.
- Uploading Content - Easily manage content in the inbox before it is saved to your library.
- Download Content - Easily download desired content.
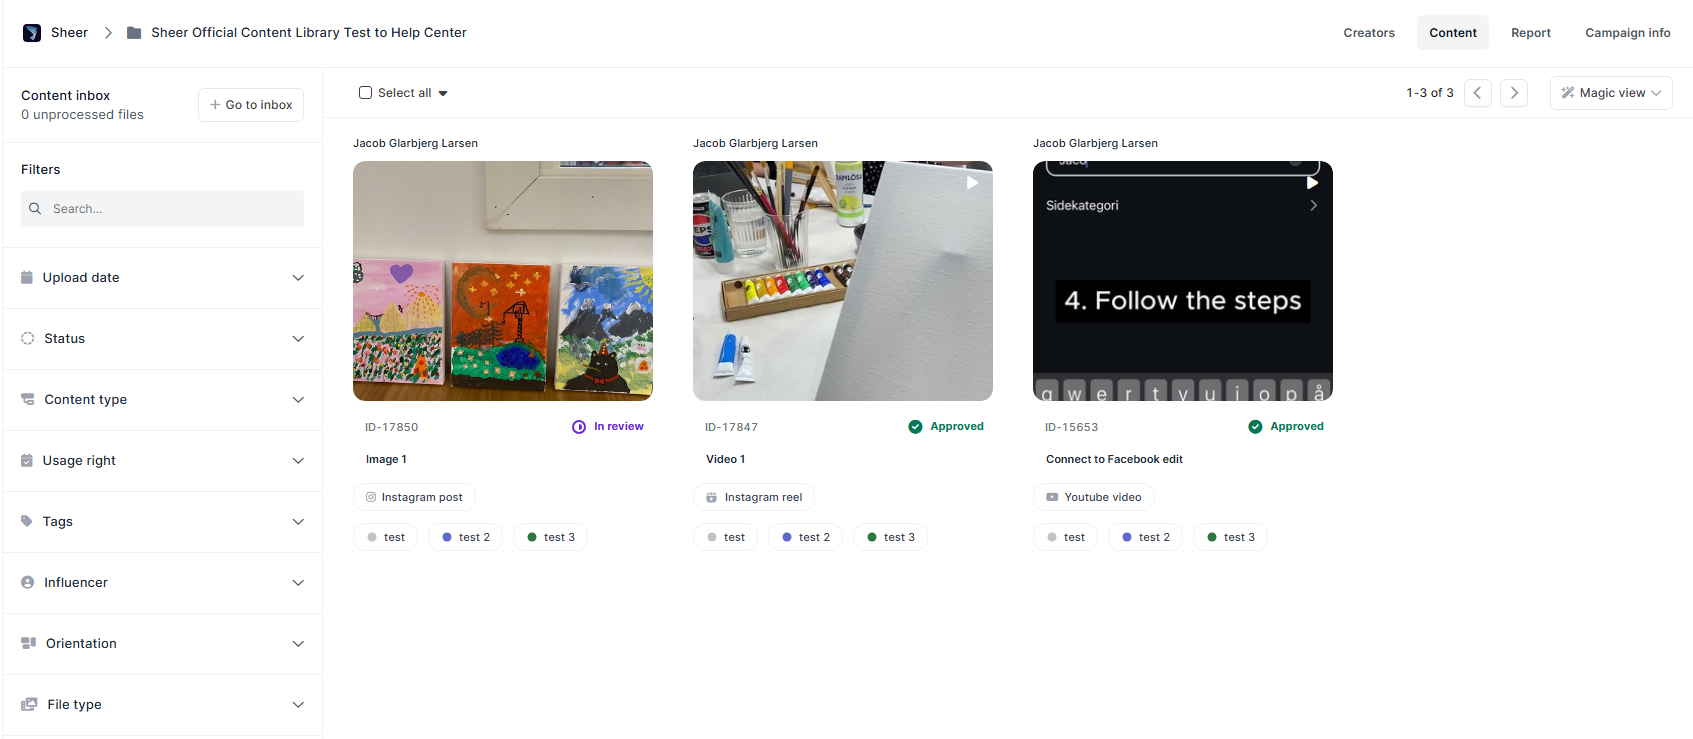
Filters & Tags
- Filters - Tons of applicable filters in the left-hand side of the Content Library, making content easily searchable.
- Tags - Create specific tags to never lose track of key content.
Content Preview & Content Review
- Content Preview - Click on any piece of content to directly view it in Sheer. Videos can be played directly in the browser.
- Content Assets - You are able to store multiple versions of the same content piece.
Tip! This is ideal for videos or images that are identical, but are provided in different formats, with or without text, music, aspect ratios, etc.
- Content Review - Sheer has a built in content reviw feature within the platform. This allows your team or an external partner to approve and reject content with a single click - making it easy for everyone in your organization to check the status of each individual content for the campaign.
- Comments Track on content - There is a comments track under each content where detailed feedback or notes can be provided for an ongoing dialogue. These comments are only visible for those with access to Sheer, so not the creator themselves.
Usage Rights
Track the specific details regarding content you’ve secured usage rights for in Sheer’s Content Library. Expired content will still be visible in the Content Library, but will clearly be labelled as expired to avoid any confusion regarding its status.Usage Rights Templates
Usage rights templates can be applied to multiple pieces of content at once in the Content Library, or on all campaign content at once if the usage rights expire at the same time. There are two kinds of templates that can be created for usage rights:- Date specific template - Where the template start and end on specific dates.
- Example: You have a campaign where all content expires on 30/5/2027. You can create a template that applies usage rights that expire on the exact specified date, when you apply the usage rights template in Sheer.
- Time specific template - Where a set amount of time usage rights are available when assigned to the specific piece of content.
- Example: You have a campaign where you have 30 days of usage rights from the day you receive the content. You can then create a template to apply 30 days of usage rights to a piece of content, when the usage rights template is applied to content in Sheer.
Upload Content
In the Content Library you have access to the Content Inbox. This is where you are able to upload and manage content before you officially save content to your organizations Content Library for others to view. Content uploaded will go in the Content Inbox prior to being available in your Content Library. This allows you to organize and filter content before sharing with others - whether internally or externally.Influencers directly upload content to Sheer
You can have your creators upload content directly to your campaigns Content Library by having them log in to Sheer themselves. We have the following guide that may be provided here.Download Content
You can easily download content in Sheer by individual content pieces or in bulk. Multiple content piece download:- Click all content pieces or use the “select all” box in the top-left corner.
- Click the “Command” box → scroll down and select “Download pieces”. A download of a Zip file should now begin.
- Click on a piece of content to enter the content preview.
- In the top-left corner you will see three dots located next to “brand name” → “Campaign name” → “content name”. Click the three dots → then select “Download piece”.
Merge, unmerge & edit order of content
Merge content- By selecting multiple pieces of content, you are able to merge the files. This allows you to store multiple versions of the same content under a single content piece in Sheer.
- This is particularly useful for having multiple formats of the same content, fx. having the same content in 9:16, 4:5 and 1:1 format. You can also merge identical content that is with and without text to stay organized.
- Click on a piece of content to enter the content preview.
- In the top-left corner you will see three dots located next to “brand name” → “Campaign name” → “content name”. Click the three dots → then select “Edit files”.
- Click the three dots under the Actions tab → select “Unmerge file”.
- Click on a piece of content to enter the content preview.
- In the top-left corner you will see three dots located next to “brand name” → “Campaign name” → “content name”. Click the three dots → then select “Edit files”.
- Use the arrows on the right-hand side under the Actions tab to move the order the merged files appear in the content preview.
Restore deleted content
Deleted content is available for 30 days to be restored before it automatically will permanently be deleted.- Hover over your brand in the left-hand side and select the three dots → then select “Open Content Library archive”.
- Select the deleted content pieces and click the “Restore pieces” button. Content restored will automatically be added to the content inbox.